Page Contents
Page 2
Click here to jump back to Page 1 for the main review of the BENQ PD2700U.
BENQ DisplayPilot Software
You can use the DisplayPilot Software to switch the modes on the BENQ PD2700U or create a new one. It does work without any bugs, but it is quite slow and thus I don’t really use it to change the brightness for example.
But it is worth taking a look as many features are available exclusively through it. The most interesting one’s are in the Tools (Werkzeuge) category. Jump right to them by clicking here.
I wasn’t able to change the language of the Software after the first install so the text is mostly german, but I will try to translate.
Display Settings

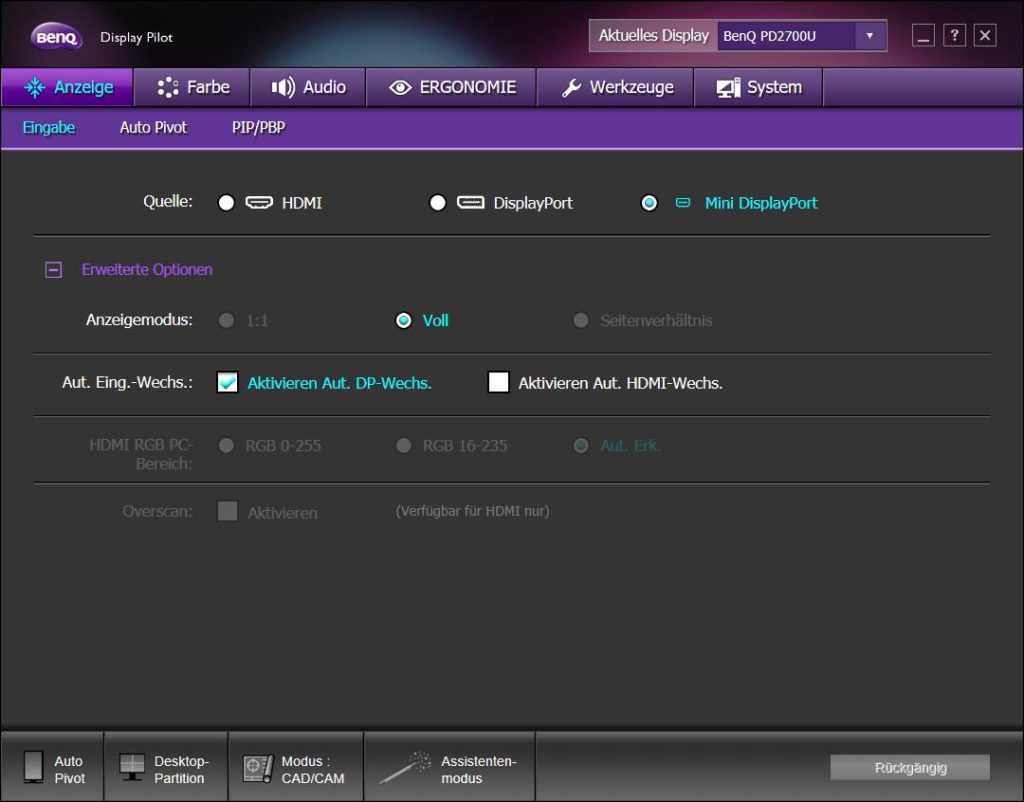
First, we have Display where we can change the Input and set which ports will be automatically scanned for inputs. There are other options like enabling overscan when using HDMI as an input.
Auto Pivot will detect whether your Display is in Landscape or Portrait Mode and automatically adjust, and this worked flawlessly every time I’ve tested it.
When we deactivate it, we can manually select the orientation, even flip it 180 degrees. This is probably a fringe use case but very nice to have.
With AutoPivot activated, I have noticed that the monitor sometimes switches to portrait mode when I use a remote desktop app on my phone, but it switched back to landscape mode after a few seconds when you’re back on the actual PC.
Next, we have PIP/PBP, meaning Picture In Picture or Picture by Picture mode. Here you can specify which port to use as a secondary input and how to display it. This also works without issues. I have tested this with an iPad pro and another computer. Both sources were displayed correctly without any stretching and the images were both sharp.
With the WEC Button, you can switch the main and secondary images. You can’t freely decide the scale and position but the presets provided should be enough for most cases.
Color Settings

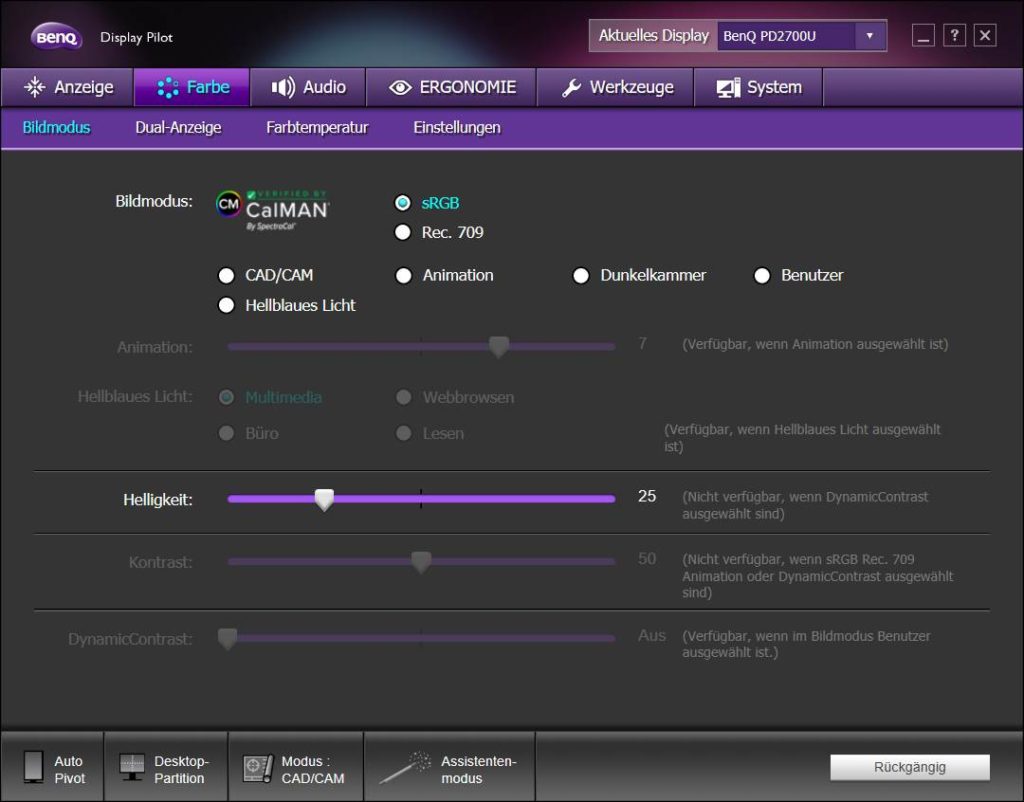
Let’s jump to the Color Tab. Here we can change the modes and adjust the brightness.
You can change most of these settings only in certain modes. For example, Contrast is not available in sRGB or Rec.709. This is good, to ensure that the monitors look similar in the same modes.
Changing to the Low Blue Light mode also gives some nice filters that tint the image yellowish based on the 4 different presets. Most OS have their own, faster to use blue light filters. But while I personally don’t use it, I can see how this could be useful.
Dynamic Contrast is supposed to change the contrast based on the incoming signal. This is only available in a user-defined presets. For me, it only tinted the image greenish and I haven’t found any reasons to enable it yet.
Dual View lets you split the display to show two modes at the same time. Quite useful to compare Rec.709 to sRGB. This will make you fall into despair when you realize every display is different and you can’t create something that looks good everywhere. But I do use it from time to time, to make sure something works for TV and Web.
And in the Settings, we have options to change Sharpness, Gamma, Color Hue, and Saturation. In Rec.709 mode, I usually have Sharpness slightly increased as Windows Text looks slightly blurry without.
Audio
In Audio we can simply change the Volume and mute it altogether. Muting will also disable the Headphone Jack output. Unfortunately, muting the speakers will not get rid of the buzzing sound I mentioned in the review.
Ergonomics
Under Ergonomics we can enable auto-brightness which uses a light sensor under the display, whose sensitivity we can also adjust. This isn’t available in Rec.709 or sRGB meaning I’ve barely seen this in action but I’ve tested it and it definitely does work.
Intelligent reminder will display a notice to rest your eyes after a set interval. I have this enabled and it’s nice to have but I have no self-control and ignore it most of the time.
Tools
Tools has some more interesting features.
For one, you can set different Profiles for when using different software. I’ve tested this and it works as intended. There is a short flicker when it changes and I personally don’t have this activated, but I can see the appeal. For example, in a 3D application, like Houdini or Maya, you might want to use the CAD mode while Rec.709 mode in Premiere or DaVinci Resolve.
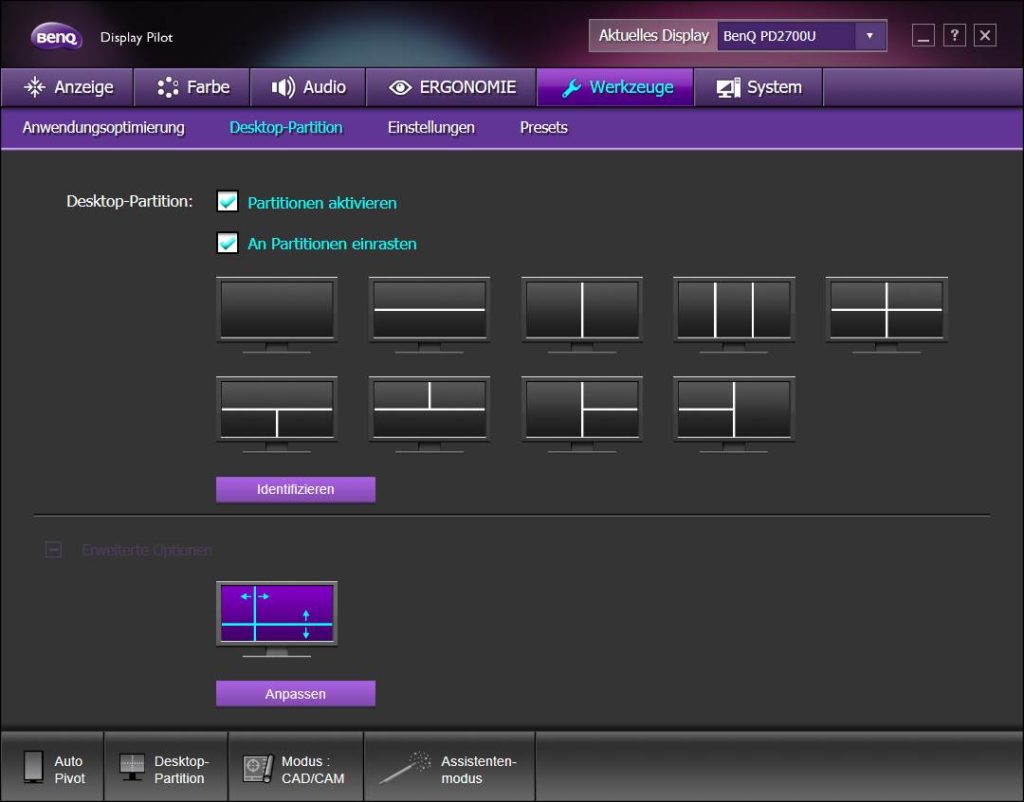
Desktop Partitions work like windows native partitioning when you drag a window to the edges of the screen, only that you have different presets available to you and can create your own as I have done here.

You place a horizontal line by clicking and a vertical line by double-clicking. You save it by clicking on the file icon up here.
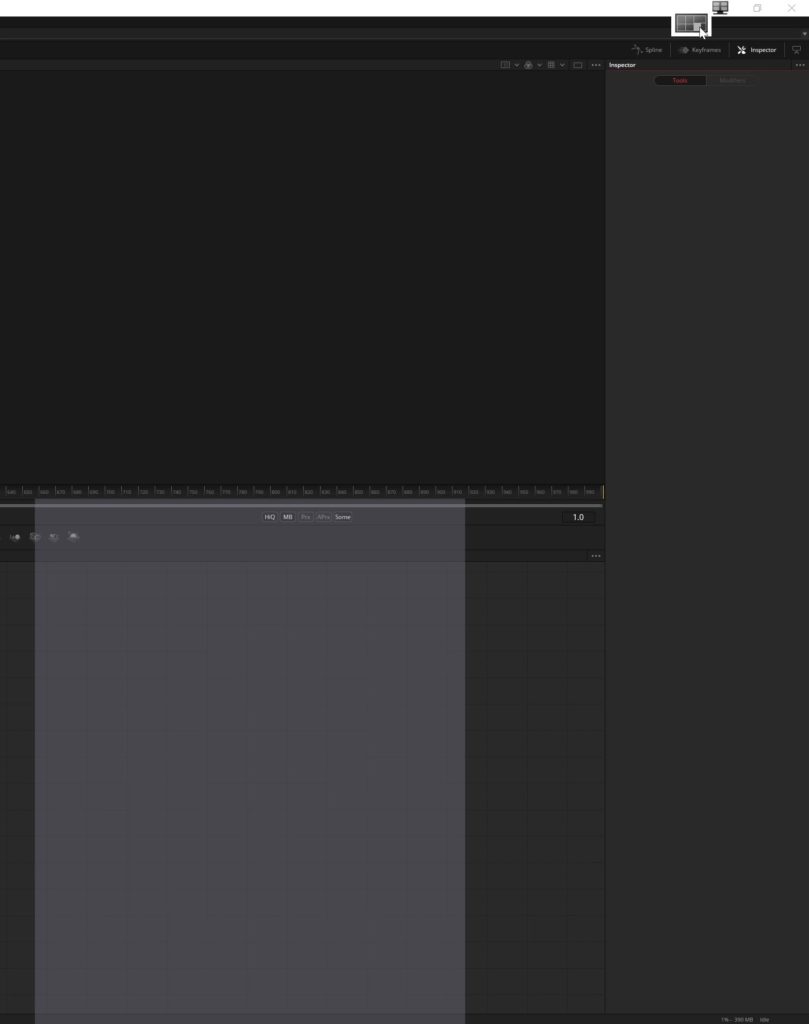
The great thing is, it doesn’t override Windows default partitions, meaning you can use both at the same time. You can either use the ugly but useable icon that is being placed directly on the minimize button for some reason. Or drag and drop them to the desired partition. You’ll see a visual aide when it detects the partition.
There is a slight gap between the windows, but overall this is nice to have in addition to windows native partitions. After all, the BENQ PD2700U is big enough to display more than 4 windows at a time.
These are the features that are available through the BENQ Display Pilot Software. Click here to jump back to the main Review of the BENQ PD2700U.
