Page Contents
Page 1
pCustom and pCustomForce are two very powerful tools in Blackmagic Design Fusion / DaVinci Resolve. Unfortunately they aren’t that well documented. This is why I decided to create a page dedicated to pCustom examples and use-cases. This should help you to achieve more with particle simulations in Fusion.
You can download the basic Examples (for free) or support me and buy the Advanced Examples I used to create the videos:
DownloadThis will also help you if you don’t have a specific problem but rather want to learn more about Fusion particles or the pCustom tool. We will also look a little bit at the pCustom Force tool as well as the Custom Tool, but this won’t be the main topic of this post.
This isn’t a complete list of all possibilities for VFX or Motion Graphics, it’s simply a collection of methods that I have used before or know about. This post will be updated when I discover new ways of using the pCustom tool. Check the Table of Contents for all examples, as this post is broken up into several pages to keep loading times low.
This is also a very good post to show the vast feature toolset that Fusion gives you out of the box, if you’re willing to learn (especially compared to After Effects for example). Nothing we are doing here is using any plugins.
We will start simple with a way to stick particles to a surface.
Particles stick to a surface mesh
Sticking particles to the surface of a mesh is difficult to achieve using the standard particle toolset. The pBounce comes to mind, but this node struggles at keeping particles truly sticky. They usually jitter or it simply takes too much time to calculate when you increase the roughness. This is a very simple pCustom example but it will help to explain the other examples.
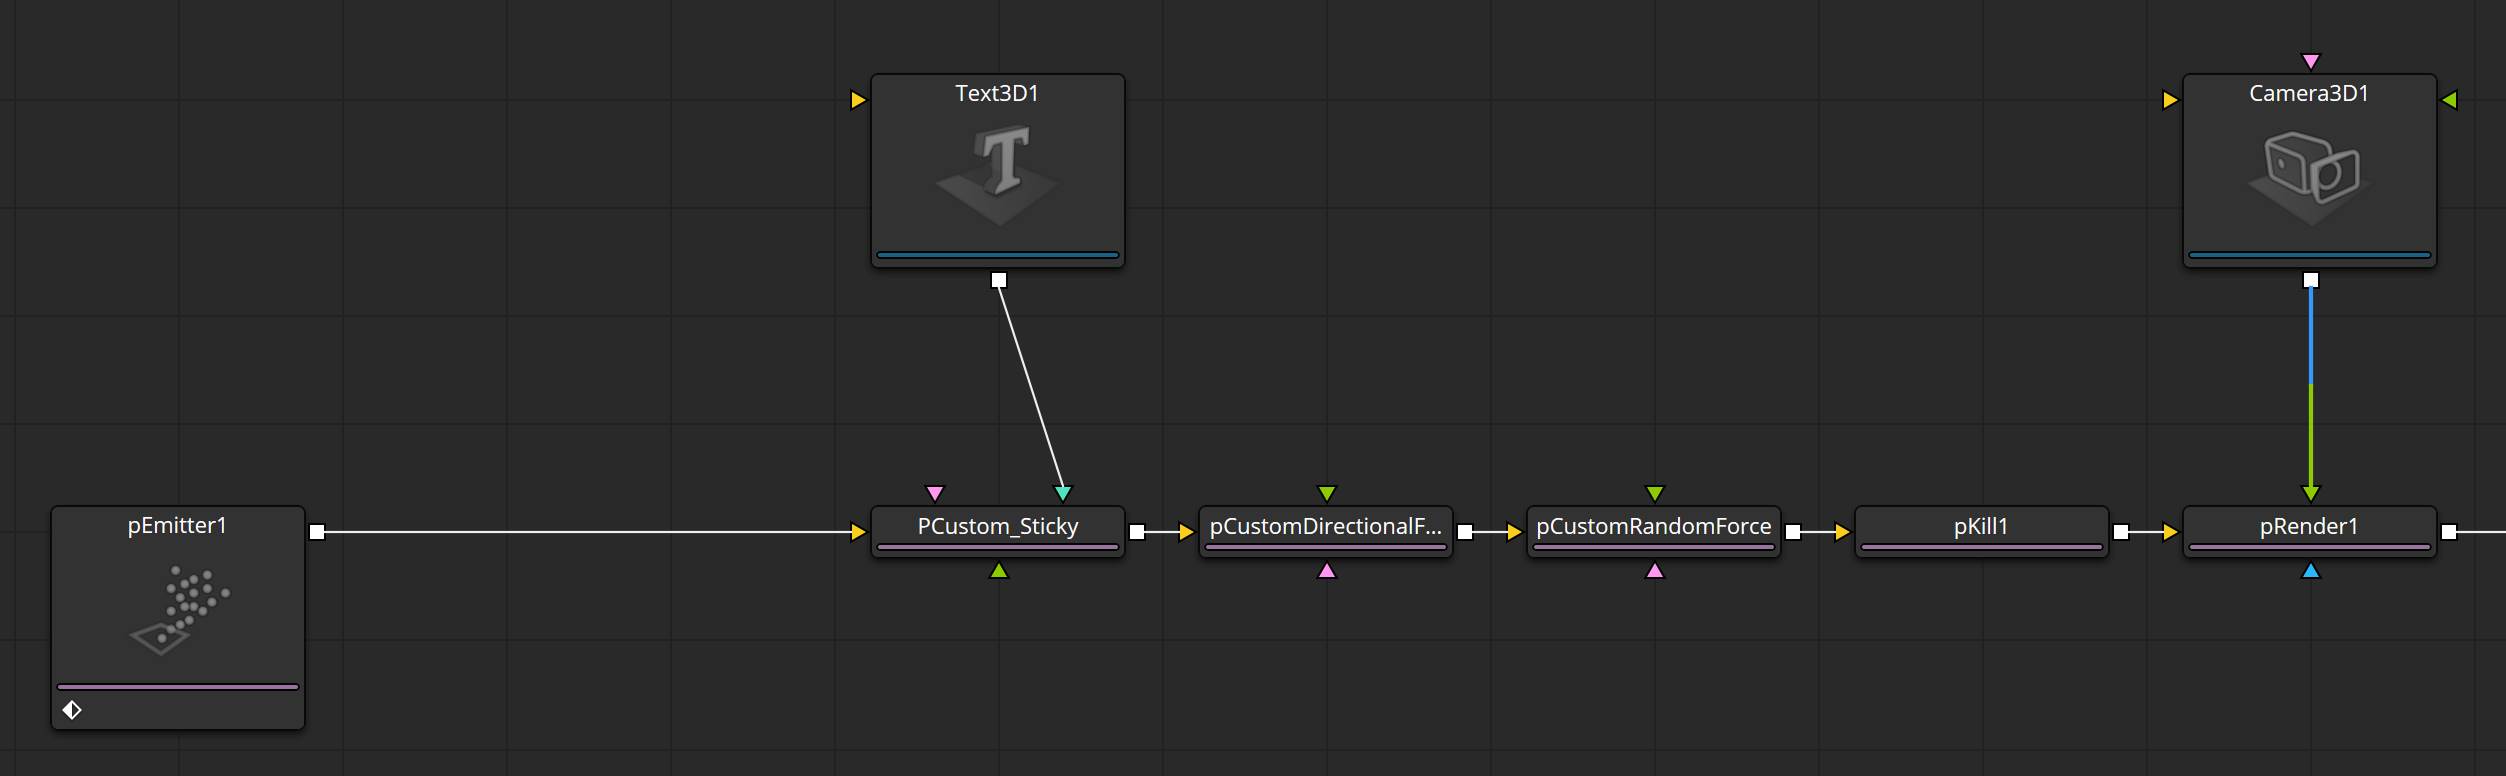

Drop down a pCustom tool and head into the Particle-Tab. Here you will type this into the Velocity X, Y, and Z fields:
Velocity X: if(rgnhit =1, 0, vx)
Velocity Y: if(rgnhit =1, 0, vy)
Velocity Z: if(rgnhit =1, 0, vz)
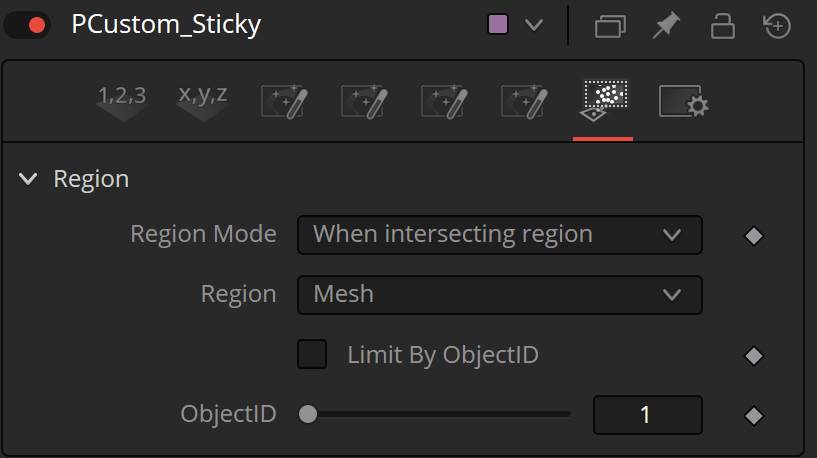
Next, go into the Region-Tab and select When intersecting region.
For the Region, you can choose whatever you like. I have chosen Mesh and used a Text3D tool as the mesh.
What is going on here?
The fields in the Particle-Tab of the pCustom tool will calculate each (sub-)frame for each attribute. And three of those attributes are velocity (three because we are working in a 3 Dimensional space and this doesn’t understand vectors).
To modify particles, we can save new numbers in these attributes which will then be copied to each particle. Putting “1” into Velocity Y for example will force the particles to move 1 unit in the Y Direction on each frame.
But we put this Expression into it:
if(rgnhit =1, 0, vy)
We start with an if() Expression. Those work like this:
if(Condition is true, then do this, else do this).
So in our case:
if(the particles hit a region, then set the velocity to 0, else keep the particle velocity).
To know if a particle hit a region we can use an attribute not visible in the pCustom tool, but used internally by Fusions particle system. This is rgnhit. This will be 0 whenever the particles are not inside the specified region and 1 if they are.
So essentially, we are telling the particles: If you are inside the region, don’t move.
Unfortunately, this method is somewhat problematic in conjunction with other particle forces. This is why for this example, I used two pCustomForce tools to recreate the pDirectionalForce and pTurbulence explained in the next two topics.
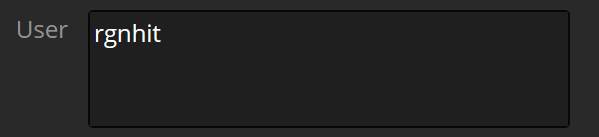
To get this working we need to save our rgnhit attribute somewhere else. I have chosen the user attribute. So in our pCustom tool, we will head back into the Particle-Tab and write “rgnhit” into the User field.
You can also use the pChangeStyle tool to change the particle sets and only have the other forces apply on Set 1 and change this to Set 2 after they collided. Usually by using the same Mesh as a Region and setting it to When entering Region.
pCustomForce Directional Force and Random velocity
Let me get one thing out of the way, these are very crude replications of the standard tools. But they work great with the previous Stick to surface example. But I find it important to explain exactly what I did for the last example. Of course, you can always extend the functionality of these.
pCustomForce Directional Force
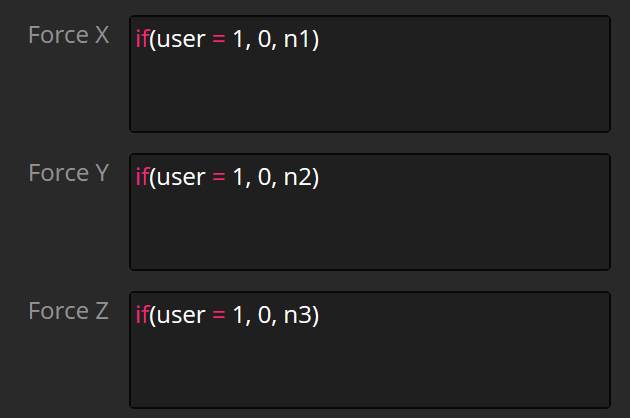
Drop down a pCustomForce tool and head into the Force-Tab. Write these expressions into the Force fields:
Force X: if(user = 1, 0, n1)
Force Y: if(user = 1, 0, n2)
Force Z: if(user = 1, 0, n3)
What is going on here?
We are using another if() Expression. (How this works is explained in the previous example). And again, we are using the rgnhit attribute.But not from this node but from the previous one, where we saved the rgnhit attribute into the user attribute.
This means, whenever the particles are inside the previous pCustom Region, then there is no force applied to the particles.
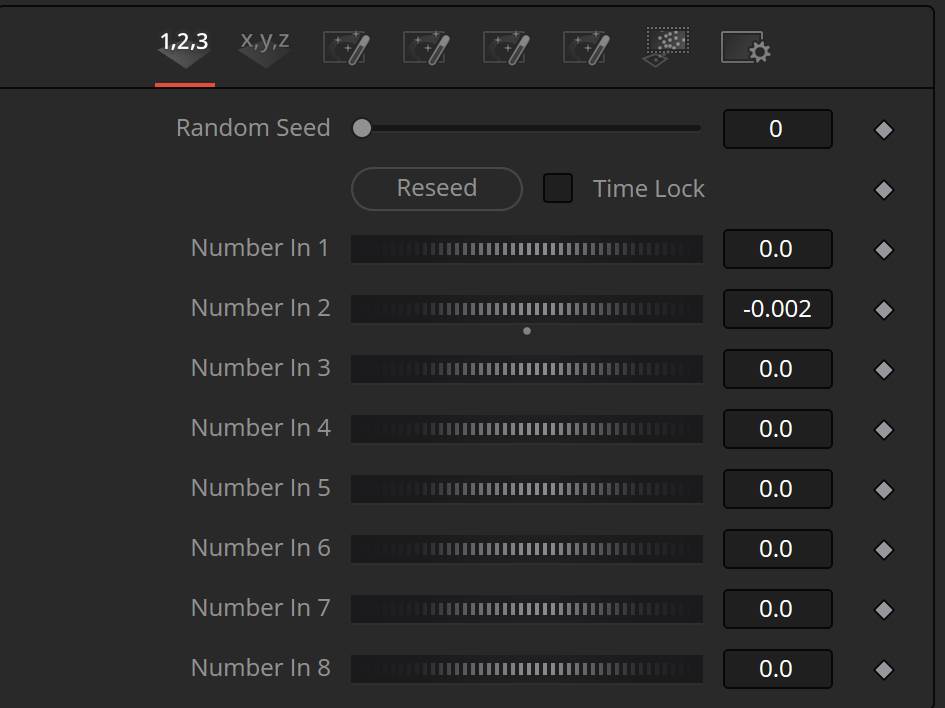
And if they are inside the region, then a specified force will be applied. This force can be changed by going into the first Numbers-Tab inside the pCustomForce tool. Here we have 8 Screw controls. And they can be called upon in Expressions by using n1, n2, n3, and so on.
I only want my particles to go down, so I have chosen -0.002 as the value for the Force Y Expression.
Note that you have to be very sensitive to dial in these values. It’s often useful to divide the input by 10 or 100 in the Expression so you can more easily use the Number Controls. For Example, you could type this into the Force Y Field:
if(user = 1, 0, n2/100)
pCustomForce Random Velocity Force
This is again, a very basic implementation and not actually comparable with the pTurbulence tool. There are other ways to achieve this in a more art-direct-able way. But this was enough for my example above.
In a pCustomForce tool, write these Expression into the Force-Fields:
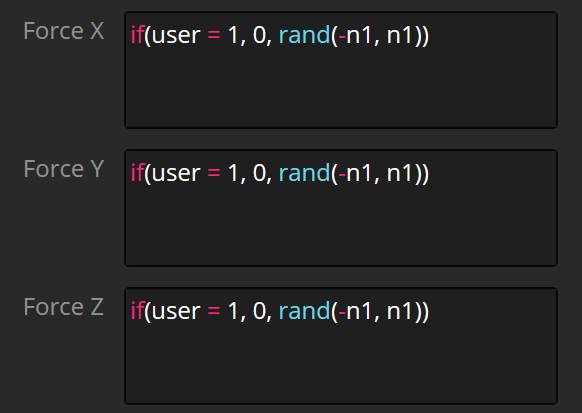
Force X: if(user = 1, 0, rand(-n1, n1))
Force Y: if(user = 1, 0, rand(-n1, n1))
Force Z: if(user = 1, 0, rand(-n1, n1))
Just like in the example before, we are using the user attribute to know whether or not the particles should be affected.
And if they should be affected, we are assigning them a random force. For this, we use the “rand()” operation, which means a random number between two values. And it works like this:
rand(Lower limit, upper limit)
We want our lower and upper limit to be symmetrical, this is why we are using the value in Number 1 for both the lower and upper limit. Only the lower limit should be negative so they can move in all directions not only in positive ones.
Download this Example here:
DownloadpCustom Particle Collider
You might be wondering why we would need a custom collision tool when the pBounce exists. And the answer is simple, pBounce is slow and particles never come to a full rest. Often, you just want to have them bounce a few times on the ground plane before stopping. This is where our primitive but very functional custom collision node comes into play and we can utilize the hit attribute seen in the example before.

As before, drop down a pCustom node. You probably want to add some gravity as well, you can use standard pDirectionalForce.
Also, we need something to collide with. Go into the Region-Tab of the pCustom tool and set Region Mode to When intersecting region and choose the type of Region you want. For a standard ground plane, you could use the Rectangle but this also works with all the other Regions or custom 3D meshes.
First, let’s break down what we need to do. We need to know:
- When a particle hits the surface (rgnhit attribute just like before).
- Then we need to know how the surface is aligned where it hit.
- Change the direction of the particle, based on the previous velocity and the surface of the collider.
- And lastly, reduce the amount of energy the particle has on each hit.
I will first show you what I’ve written in the pCustom tool and then break it down.


In the Particles-Tab:
Velocity X: if(rgnhit =1, ((rgnnxmass)n1+(vxn3))+(rand(-n2, n2))mass, vx)
Velocity Y: if(rgnhit =1, abs(((rgnnymass)n1+(vyn3))+(rand(-n2, n2))mass), vy)
Velocity Z: if(rgnhit =1, ((rgnnzmass)n1+(vzn3))+(rand(-n2, n2))mass, vz)
Mass: if(rgnhit = 1, mass*n4, mass)
What is going on here?
First, we check if the particle did hit the Region, using an if expression. If it doesn’t then it simply uses the current particle velocity. But if it does, we will change the velocity of the particle.
For that, we are using the surface normal of the region with the rgnnx attribute.
If you are not familiar with 3D Softwares: Surface normals are essentially direction vectors telling your computer how a surface is aligned in 3D space. This is usually used to calculate how light bounces off the surface. But in our case, how particles bounce off the surface (pretty much the same concept though).
But we need a way to control the strength. Because a ground plane, for example, would have surface normals of X:0, Y:1, and Z:0. Meaning the particles would accelerate to 1 unit of speed per frame in the Y-direction. Much too fast. So we multiply it with the Number 1 slider (n1).
Next, we need to take velocity energy out of the simulation, otherwise, the particles would always jump the same height, never slowing down or coming to a rest.
For this, we will utilize the Mass attribute. In the Mass-field we will again check if the particle hit the Region. And when it does we will multiply the current mass by the Number 4 input (n4).
Enter anything below 1 into the Number 4 input to reduce the energy for each particle after each hit.
Back in the Velocity X-field, multiply the current expression with the Mass attribute. The lower the number in n4 the fewer bounces the particle will make. Eventually, the energy will be so low, that the particle comes to a complete stop.
If we were to type this:
if(rgnhit =1, (rgnnx)*n1*mass
into the two other Velocity fields (changing rgnnx to rgnny and rgnnz of course), we would already have a working collision simulation.
The only issue, the particles currently only use the surface normals to change the direction they are flying. They are not taking into account at which angle the particle hits the surface.
This is why we need to add the velocity to the equation as well, like this:
if(rgnhit =1, (rgnnx)*n1*mass+(vx*mass*n3), vx)
The explanation is simple, we use the current velocity, multiply it by the mass, and the Number 3 input (n3). This can work more or less like a friction slider. Now, the particles that hit at an angle will bounce off at an angle, too.
And this is pretty much all. You can modify this expression ( if(rgnhit =1, (rgnnx)*n1*mass+(vx*mass*n3), vx) ) for the other velocity-fields (Y, Z) and have created yourself a working collision simulation.
But you might have noticed, that my Y-Velocity Expression is different from X and Y. This is because we have a negative Particle velocity in the Y direction, due to the gravity we have added with the pDirectionalForce. This is why I added the abs() function to it. This will simply take any negative values and make them positive.
if(rgnhit =1, (rgnny)*n1*mass+abs(vy*mass*n3)+(rands(0, n2, id*time)*mass), vy)
But then there is also a random function as well. I’ve added this because I wanted to introduce some randomness to the simulation. Otherwise, particles being emitted from the same height would all move exactly the same. Not looking organic at all.
if(rgnhit =1, (rgnny)*n1*mass+abs(vy*mass*n3)+(rands(0, n2, id*time)*mass), vy)
I have chosen the rands() function instead of the rand() function we’ve used before, for no special reason at all. I just wanted to see how it worked, you can use rand(0, n2), too.
The Number 2 (n2) input can be used to specify the amount of randomness. It’s important to multiply this by the mass, too. Of course, you also just multiply the whole Expression by the mass once, instead of three times like I did here.
As in the example before, this can struggle with forces like the the pTurbulence. You can either create your own versions using the pCustomForce as explained above, or use the pChangeStyle to change particle sets.
Due to the length of this post, I have broken this page into multiple sites to reduce the load times. But there are more awesome examples on the next pages.
Download this Example here:
Download

