Page Contents
Page 2/2
Create the Animation
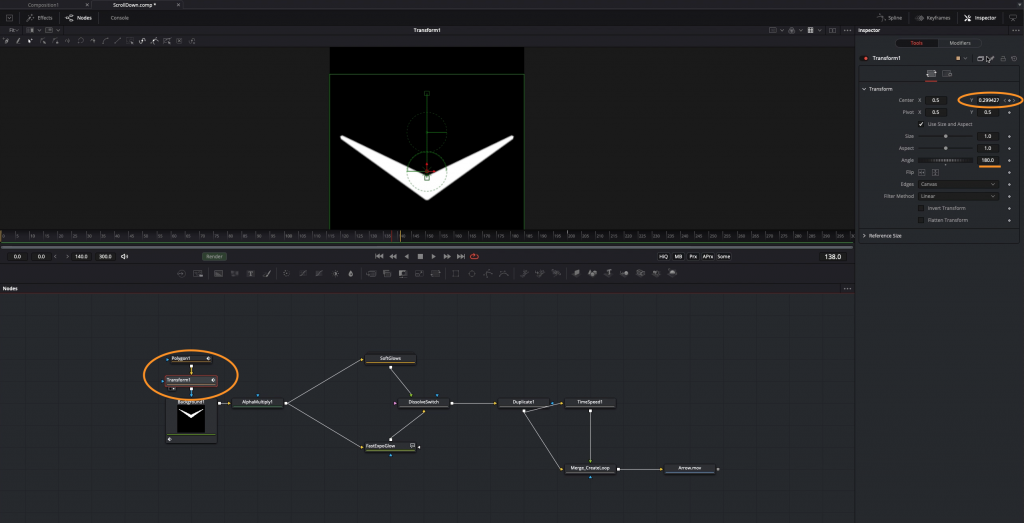
Now that we are done with the arrow itself, we can focus on the look and animation. Create a Transform Node. Pipe the Output of the Polygon Node into the Background Input of the Transform Node. By default Fusion will pipe the Polygon Node into the blue Mask input. If you struggle to find the right input, drag the Output wire of the Polygon Node onto the Transform Node while pressing Alt. A popup will let you select the right input.
First, we need to rotate the whole arrow by 180 degrees. Then, animate the Y-Position by enabling the keyframes on that parameter in the Inspector. Set a keyframe when the arrow is at the top, go forward in the timeline (in my case 200 frames) and drag the arrow to the bottom.
The arrow is moving, but it doesn’t look as energetic as we want. Now, we will change the speed curve of the movement path by going into the Spline Editor. Click on Spline on the upper right. In the Spline Editor, click on the three dots on the upper right and select Show only selected Tools. Click into the window and press Cmd-F or Ctrl-F to frame the Spline. Now we see a linear spline. This represents the position on the Y-Axis. We want to change this to ease in and out very strongly.
Press Cmd-A or Ctrl-A to select all points. Then press Shift-S to smooth the points. This is exactly like when we smoothed the points on the arrow before. But instead of having to pop open a dialogue to change the smoothing, we simply press T. Increase the handle length with the new options above the Spline-Editor.
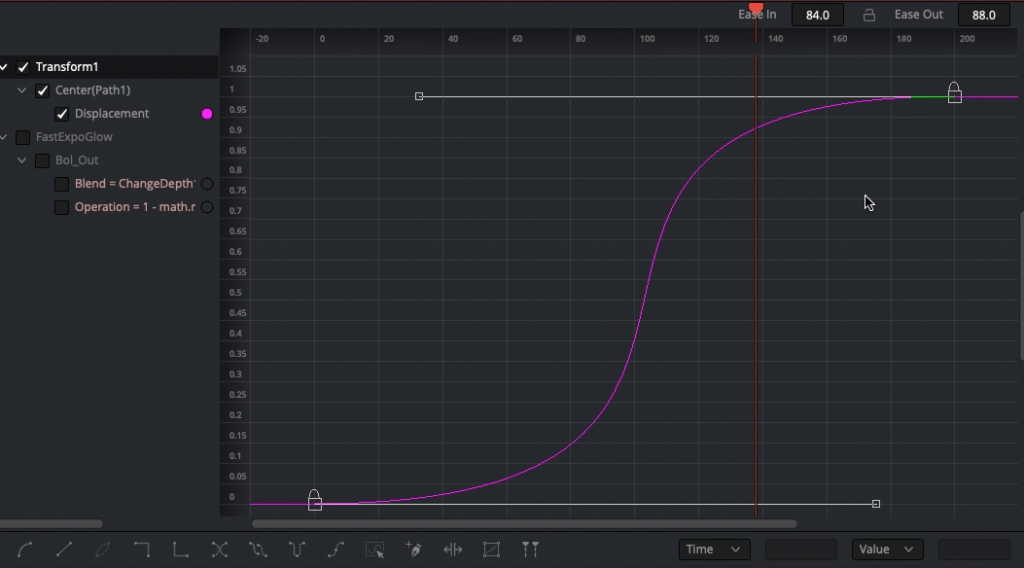
This is the kind of movement we want. I also added a slight motion blur by going into the settings of the Transform Node and enabling Motion Blur. But we won’t actually see a big difference since this icon will be very small.
Now that we have our animation, we have to create an actual image out of this. Pipe the Transform Node into a Background Node. Here you can give it a color. If the arrow looks different, you may have to change the resolution of the Background Node, exactly like you did with the Polygon Node before.
I want the arrow to fade in and out. You can do this by animating the Level on the Polygon Node, or (like I did in this case) by animating the Opacity on the Background Node. If you do the latter, you will also need an Alpha Multiply Node to actually see the fading.
Make it Glow
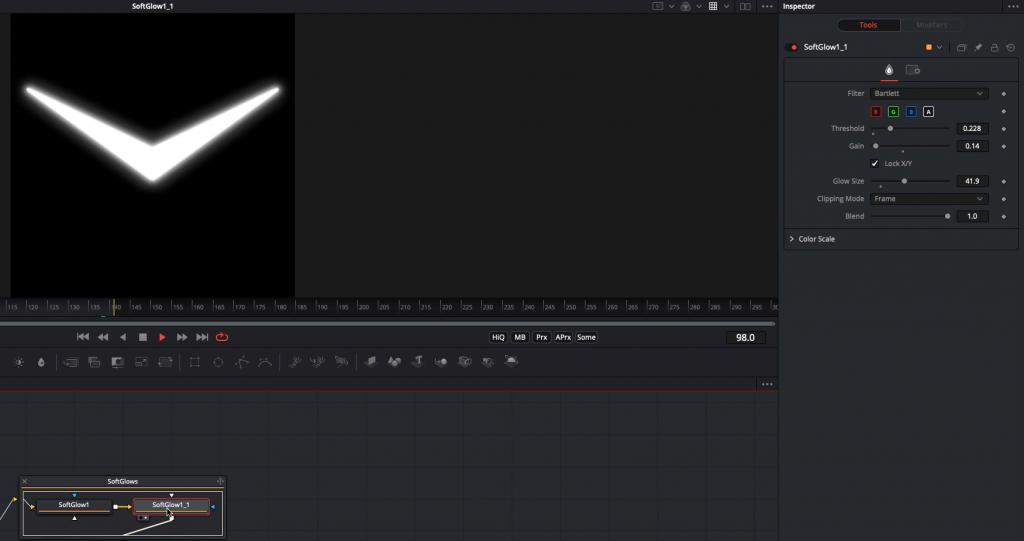
Next, I want to have a very subtle glow. In my initial set-up I used the Reactor Fuse FastExponentialGlow. It’s a very nice but slow glow effect. Also you would need the paid version to install Reactor. So instead I used two Soft Glow Nodes . The first with a stronger Glow but very small Glow Radius and the second to the opposite. Bigger radius but weaker glow. I put the threshold to around 0.2. Play around with the settings until you have something you like. I personally like to use the Bartlett-Filter, not only because it’s slightly faster but looks more interesting than the Gaussian-Filter.
Duplicate
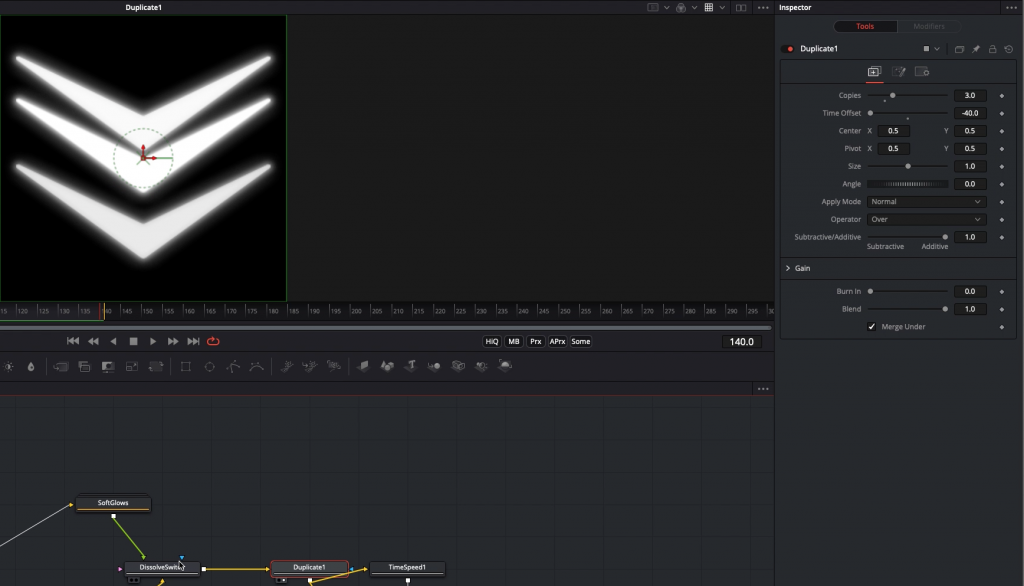
One arrow is too few. Use the Duplicate Node. For my animation I chose 3 copies that have a Time Offset of -40 frames.
(Don’t worry about the Dissolve Node in the screenshot. This is just a poor man’s switch node, which I used to toggle between the Soft Glows and the Exponential Glow. )
Make it Loop
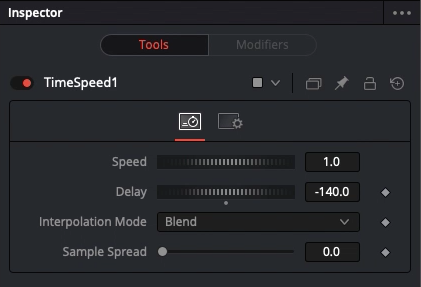
In the next step we will make it loop. Add a TimeSpeed Node and a Merge Node. The Time Speed can be used to retime your inputs. In my case a Delay of -140 frames worked, your numbers may vary. Pipe the Outputs like shown in the image below, into the Merge Node.
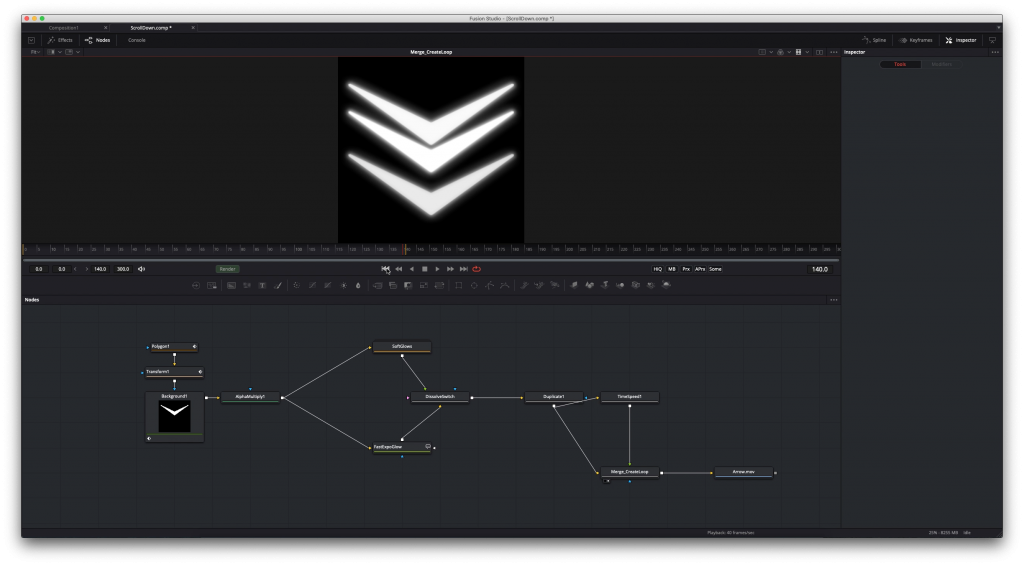
For my animation, I changed the render range to 140 frames as well, now the animation loops. The timeline range should be long enough so the Timespeed Node gets all the frames it needs. I set it 300 frames long. If you use Resolve, and your Fusion Clip is too short, add the Fusion Clip to a timeline in the Edit Page and expand it like you would with normal footage. Now jump back to the Fusion Page, the timeline range should be bigger.
Project File
Is something not working for you? Then copy and paste the following code into Fusion and you can check what I made different:
Rendering
Now we are almost done. Add a Saver Node. Choose the file type and location. I chose to render it as a PNG Sequence, although I later had to convert it to a video for Adapter to work properly.
Resolves Saver Node hides some of the controls and by default renders as EXR. If you want to change that to PNG, simply put .png to the filename. You could also render it in the delivery page and set an in/out point there. Make sure your render range is correct and hit render. Or in Resolve go to the menu bar under Fusion > Render all Savers.
Creating the GIF
Good that this is a written tutorial and we don’t have to argue about the pronunciation of GIF. But it’s fairly easy to create one. If you have Photoshop you can use that but to keep it 100% Free we will use a freeware called Adapter. Simply drag and drop your file into Adapter. Use the Video to Animated GIF preset. Change your framerate to Source and your resolution to something more web-friendly (I chose 50*50). Select the output path and hit Convert.
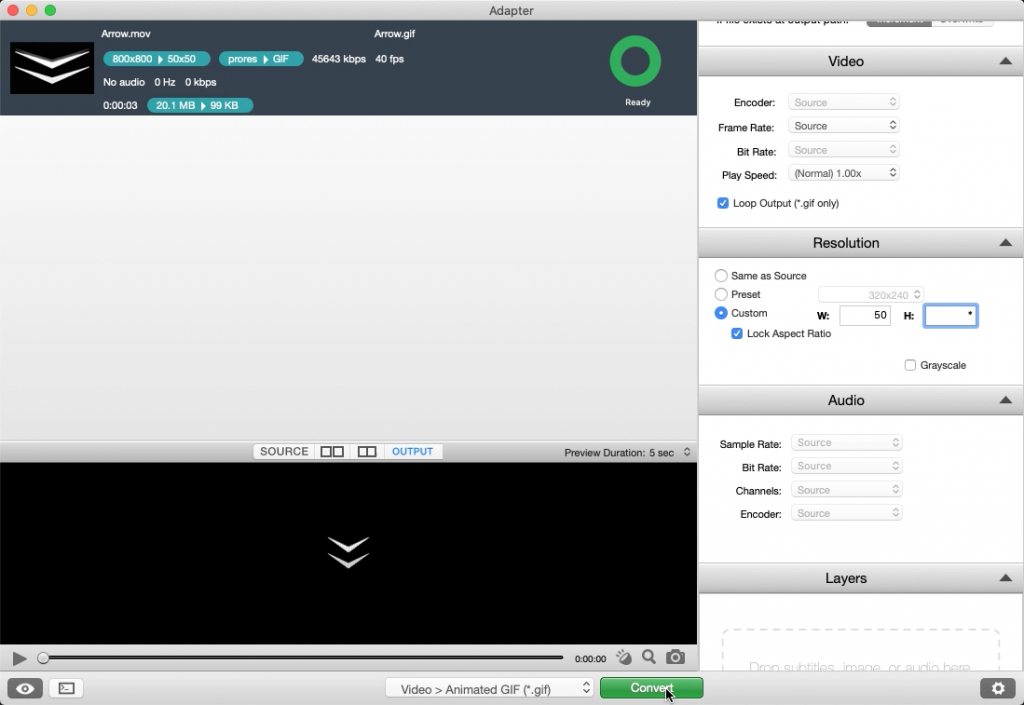
Now you have a beautiful arrow animation, telling you to scroll down.
I hope you learned something and If you have any question or suggestions I would love to hear them!
