Expressions in Fusion (DaVinci Resolve) are quite helpful. They can parent controls to each other, animate without keyframes, or automate your composition to some degree. But for many, they are this big enigma of misunderstanding. This blog post is more meant as a useful Expression collection but can also be seen as a tutorial for each snippet I show.
If you know what you’re doing or don’t care about background information you can click here to jump straight to the first Expression example.
I will collect some Expressions that I find helpful and explain what is happening. But let me get one confusion out of the way. The “Simple” in “Simple Expressions” does not stand for easy. It is the name that Blackmagic/Eyeon gave the kind of Expression that you can use by right-clicking a tool’s parameter and hitting “Expression”.
This does not mean that you need a master’s degree in expressionisms to understand what we’re doing, it simply means that I am not covering the Expression Modifier or Scripting in this blog post. (I recently published a blog post about using the Expression Modifier to blend between positions here.) I am trying to slowly increase the difficulty of the explained Expressions so you can learn them step by step.
But first, if you are somewhat new to Fusion (or not that deep into Expressions) the next two topics are for you. It will be quite a bit of knowledge that I dump onto you at once, but if you know (and understand) these things you will know more about Expressions than most intermediate users.
Page Contents
General information about Expressions
Expressions and your cache
Expressions are code-snippets that can read out a state or a value of your composition or of the Tools inside. The reason to use Expressions is that they are dynamic. They will update their output every frame without user input. Great, so we just use Expressions everywhere and can lay back? Wrong! Like everything in life, there are consequences. To demonstrate this, copy the following code and paste it into your Fusion composition:
You should see this in your composition:
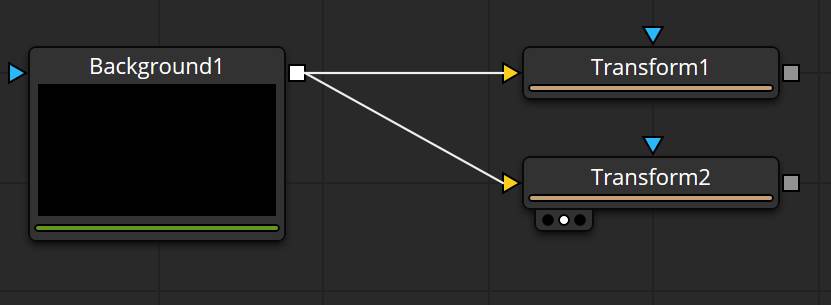
I have simply created a Background tool and created two Transform tools. Transform2‘s Center Control is connected to Transform1.
Click on each of the Transform tools. Noticed anything? Look at your Timeline. This is when selecting Transform1:

And this is when selecting Transform2:

The green bar indicates which parts of the currently selected tool are cached to RAM. Fusion understands freeze frames or static images and will only calculate them once. But Fusion cannot know if the value of the Expression in Transform2 will change as it has to stay dynamic. This is why it needs to recalculate the Transform2 on each frame.
This might not be an issue here, but believe me when I say it will make a huge difference if a node branch of dozens of nodes needs to be recalculated each frame.
But what is the solution to this? What if we need to parent controls to each other? If you HAVE to use an Expression you could use a TimeStretcher tool and set it to a freeze frame (or animate the parts where you need an animation). But in 9 out of 10 times you should use an Instanced tool or a published control instead.
To create an Instance select Transform1 and copy it by pressing Ctrl+C. Now paste it with Ctrl+Shift+V and connect the Background tool to it. It should look something like this:

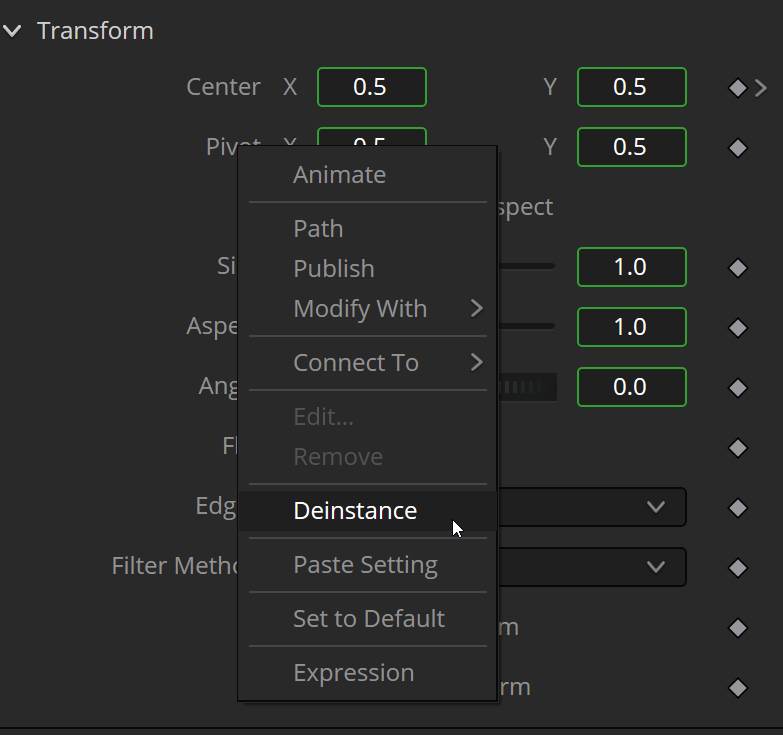
Now if we view the Instance_Transform1 you will see that it properly cached the whole static image. All controls are connected to the original Transform1 without the need to recalculate the tool each frame. You can still animate all the other controls individually by deinstancing them but you keep your freeze frame and the speed.
Or you can right-click on a control and select Publish. Now you will find that control in the Connect to-menu when you right-click another control. This can create clutter in that list, especially when you are also using Trackers or many animations that are Published by default. And in most cases, you will be better off with an Instance.
The reason why this works differently is that under the hood, there is a direct connection to another control instead of requesting the value of a control frame by frame.
More Expression Trivia
Expressions are case sensitive. Just one capital letter wrong and it will not work, so always check your capitalization (and spelling in general) before giving up on a broken Expression.
Something else to keep in mind, Fusion can’t change several inputs (parameters/controls) at once. This includes Expressions. So if you copy and pasted an Expression to several inputs and find out you made a mistake, you will need to change them one by one OR you can make your life easier by using my Change Strings Script which can search and replace in several Expressions at once.
One last bit of Trivia before we write our first Expression. Much of what you can put into Fusion is using (or is based) on the programming language Lua. If you know it, great! If not, don’t worry. Simple Expressions only use a tiny fraction of what Lua is capable of. I started using Expressions in Fusion long before I even knew Lua existed. But it’s still good to know because if you are comfortable with Simple Expressions you won’t find scripting for Fusion too difficult.
How do I decipher an Expression?
I am going to start with something that might be more advanced than what you would expect as “your first Expression” but trust me, this will save you so much headache, even if you don’t understand exactly what is going on.
As you know by now, Expressions can be used to get a dynamic value, for example, the value of the Size Control on a Transform tool. When you change the Size Slider, the Expression will output a different value. But sometimes there are Expressions that will output a text (string), or a state/boolean (true or false). In these cases, it will be quite difficult to fix an error if you can’t see the output of the Expression.
This is where the Text+ tool will come in handy to read out the state of every kind of Expression, not just number values.
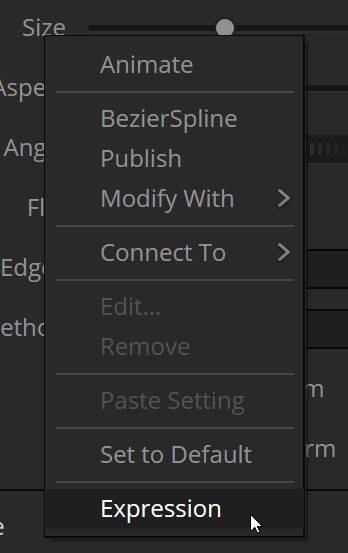
In your Text+ tool, right click the Text-field and click on Expression.

Now an Expression-field has popped up underneath. It’s small and annoying to type in (like all Expression-fields) but it’s still a big help. To demonstrate how it can help us, delete the quotation marks and type in between the brackets comp.HiQ
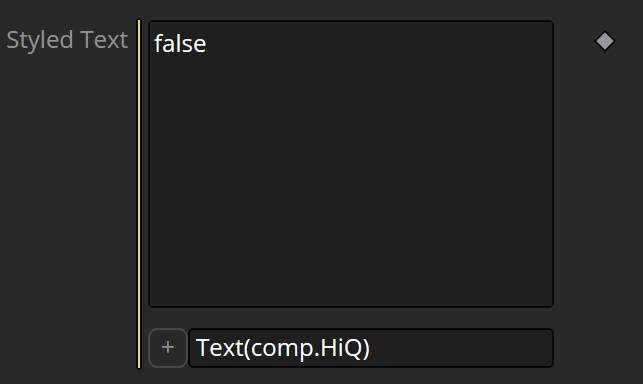
Now, activate and deactivate the HiQ-Button and see what the Text+ tells you (you might need to go forward a frame if it doesn’t update). It tells you “true” when you have activated HiQ-Mode and “false” if not. If you are in DaVinci Resolve, you need to right-click next to your Play/Pause Button to get access to this Button.


The Text() function will take anything you have typed between the brackets and convert it into a string (text) that can be displayed.
And I cannot stress this enough: Use this technique if an Expression isn’t working as intended! 8 out of 10 times you will simply have made a typo, but the other two times you will probably have mixed up an if()-Statement or get a different state as you intended from your Expression. And to solve the issue in these times, without reading out the state, will age you 5 years from stress.
Simple Expressions
Parent inputs to each other
The most important and easiest Expression. You want one control to always have the same value as another. In the Expression field: Type in the name of the tool, dot, and the name of the parameter (also referred to as input).
Name.Control
For example, you want to parent the Size of the Transform2 to the Size of Transform1. Type:
Transform2.Size

into the Expression-field of the Transform1 tool. You can always find out how an input is called by hovering over it and seeing the text in the bottom left corner.

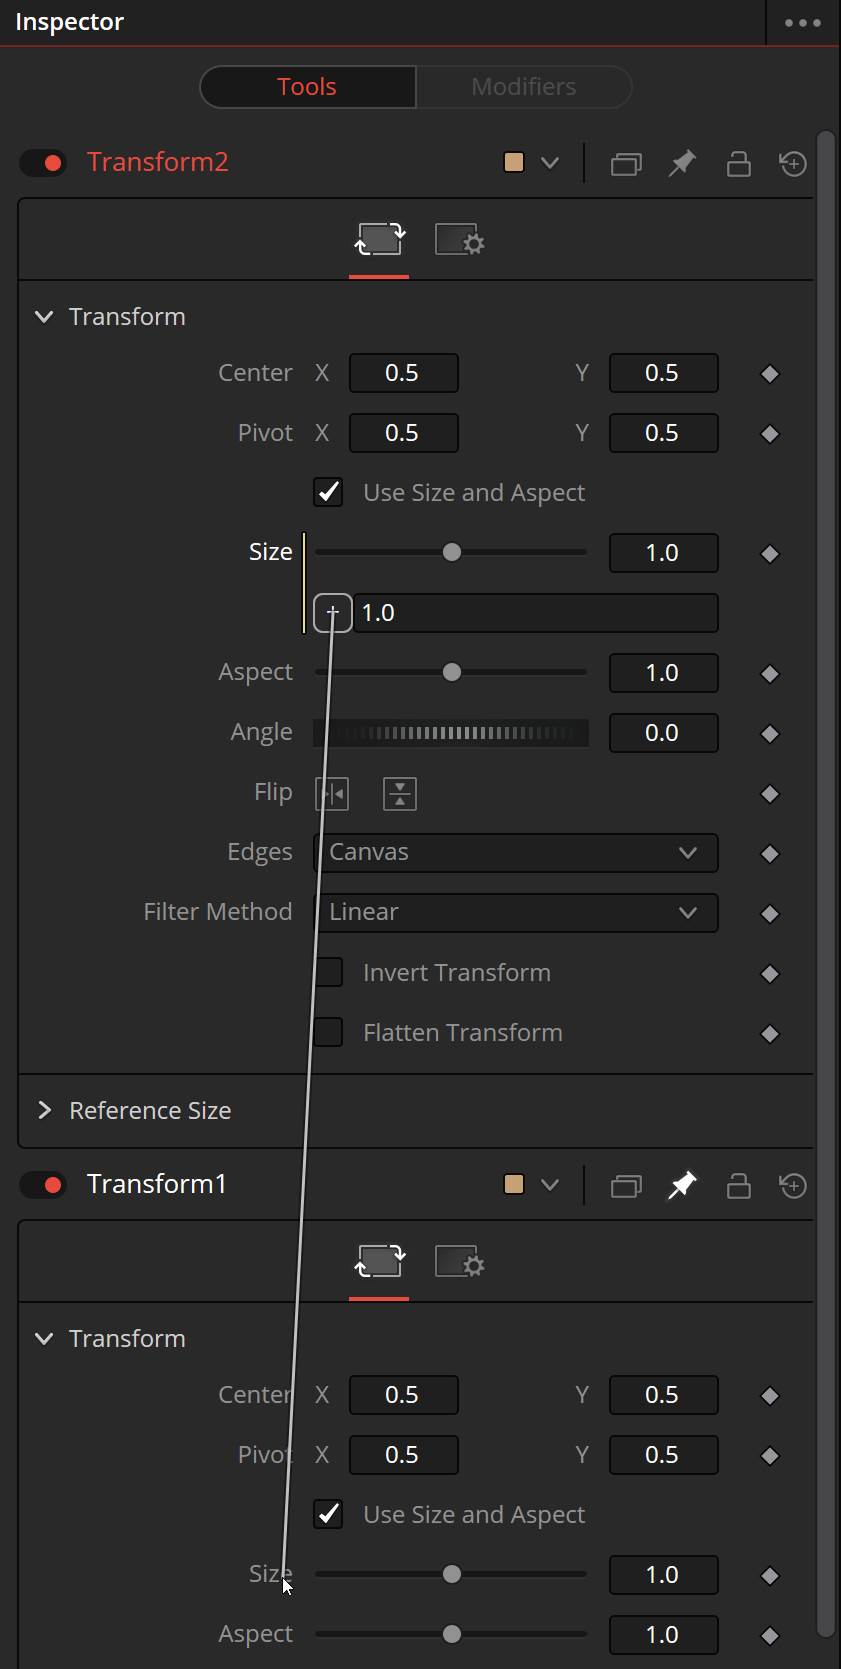
But typing is hard, so instead of doing that, pin the tool to the Inspector. This way you can have several tools in the Inspector.
If you’re new to Fusion you have probably just now realized that you usually only have a single tool’s controls visible at once. But now you can use the pick whip to select the desired input. (Just like After Effects).
Remember that you can add(+), subtract(-), divide(/) and multiply(*) the values you get with numbers, other inputs, or inputs you have created yourself. For example, that way you could animate an Expression as shown here.
Access a single value of a Position Input
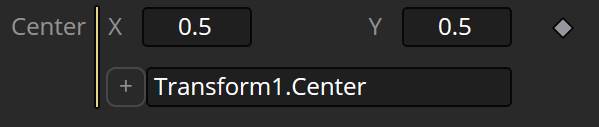
If you wanted to parent two position-inputs to each other, for example, Transform1.Center and Transform2.Center you can simply link them by using the pick whip as shown up above. But what if you want to parent only the X position. It’s very easy but it took me until I started to learn some Lua to figure it out.
The reason for that is, hovering over any Position value (like Center) will only give you the tool’s name and Center (Transform2.Center). X and Y are not separate at first glance. But if you get to know Lua you know that you can access sub-tables by using the name and a dot.
And guess what the Fusion .comp file is: A huge Lua table.
So to access the X position we simply type in:
Point(Transform2.Center.X, 0.5)

As it turns out, we’ve been using Lua Tables the whole time. “Transform2.Center” was already accessing the “Center” sub-table of the Transform2-Table. The same goes for the Y Position which would be:
Transform2.Center.Y
But what the heck is this “Point()”?
Exciting! This is already our second function in an Expression. (Except if you haven’t read the very important Chapter about the Text() function)
Fusion uses the
Point( Value1 , Value2 )
function to describe 2D vectors. The keyword here is “2D”, as this is the only place (as far as I know) where Fusion will describe a value this way. Even the Transform3D will have three (visibly) separate controls for the X, Y, and Z Positions, without the need to use a function to apply them in an Expression.
Why do I point this out? Because once the Position X is bound to an Expression we can’t change the Position Y without changing the text in the Expression-field manually. If you find yourself in the position situation of needing to change the Y Position frequently (or animating it separately) you can create a custom control and type it into to Value2 of the Point() function. The same applies the other way around if you want to parent the Y Position but want to change the X Position more intuitively.
But especially if you are parenting Transform tools to each other, think for a minute if an Instance or a Published Control would be a better choice. If you don’t understand why then please read this chapter here.
On the next page, we will use the if() Expression.


