Page Contents
Page 3
Volumetric God Ray
Let’s start working on our final part of the animation which will be the 3D god rays. This is done by using the Volume Fog. A tool that I adore because it is very VERY powerful and versatile. (There is a QuickTip about this available here)
While this does create a 3D volume it is actually a 2D node. It gets its 3D Data in two ways. By giving it access to a 3D scene and most importantly, another Extra Output Channel called World Position Pass.
But we can’t, or better, won’t use the R3D_Base for this, since we can only generate World Position Pass Data where we have an object. This is why we will create a third 3D scene exclusively for our Volume Fog.
Creating a World Position Pass
We start by taking a Shape3D and change the Shape to a Sphere. We will increase the Radius of the Sphere so we always stay inside of it. Again, we will add another Merge3D and merge our Camera into it. Now we have our Camera moving inside the Sphere.
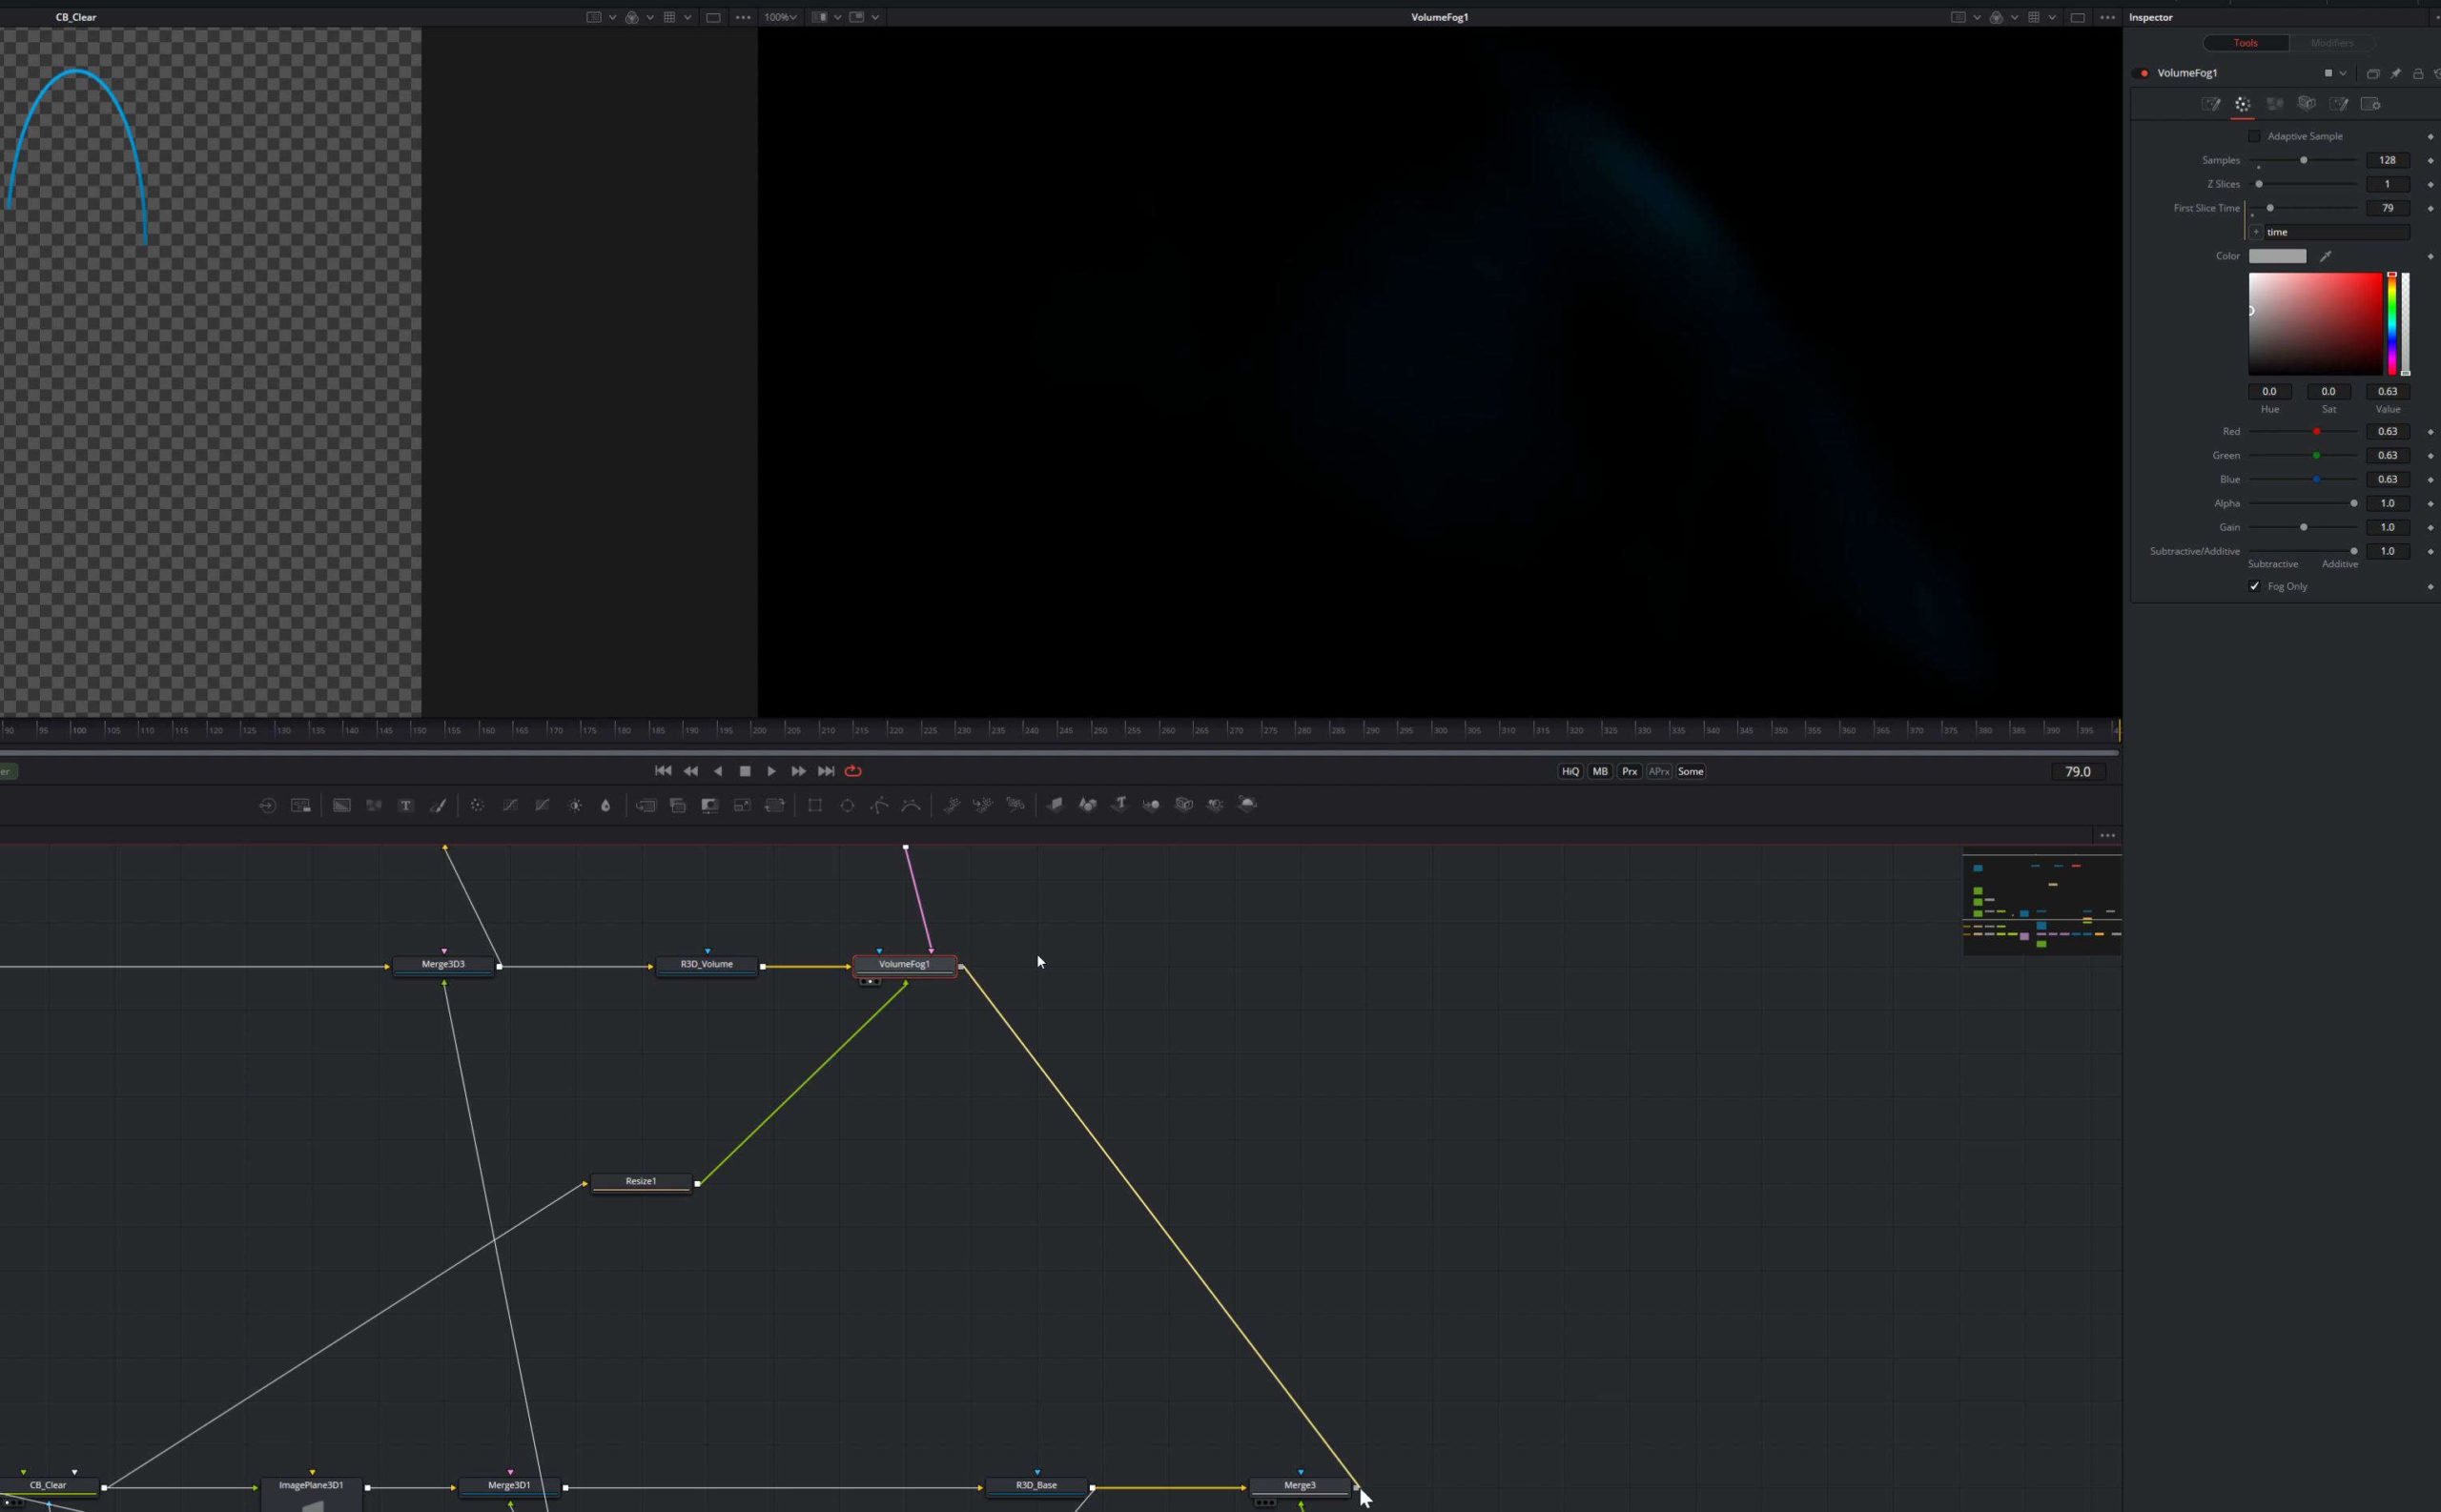
Next, we need another Render3D and rename this to R3D_Volume. Right now, we only output a fully white image, so in Output Channels activate World Position. If we look at this channel in the viewer, we can see that Fusion is putting out weird colors. Those are telling Fusion where each pixel is located in 3D Space. And again, for this, you want to be on the safe side and set the Render3D node to 32Bit, if it isn’t already. (00:43)
3D Volume Fog
Now we add a Volume Fog node after our R3D_Volume and are greeted with the same white image as before. This is because we are compositing a white volume onto a white image. (01:40)

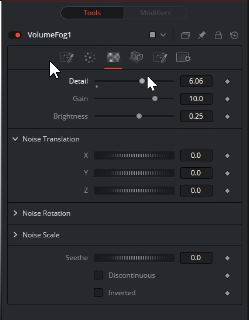
Let’s head to the Color Tab of our Volume Fog and check Fog Only. If we change the Color we can see that there is definitely something happening. Go into the Noise Tab and increase the Detail, we can see that we now added a 3D Noise to our Volume. (02:08)
By playing this, we can see that it’s already moving, but this will not line up to our camera yet. We can see why if we go into the Camera Tab. Fusion has created a new camera at the origin, inside the Volume Fog.
This is why we have a 3DScene Input at our Volume Fog. We pipe our Merge3D into the pinkish 3D Scene Input and now we will have the correct camera movement. (02:30)
The Volume in Fusion doesn’t work with voxels as other 3D applications do. Meaning we won’t be able to directly import VDBs for example. It rather works by stacking many planes of images in front of each other and treating them like a 3D Volume. And this allows something very powerful: Creating volumes out of image sequences.

Let’s do just that, by piping in our initial animation from the CB_Clear node into the Fog Image Input. (03:20)
And still, nothing. This is because the Volume Fog is not animated by default. The First Slice Time is the first frame it uses to create the Volume and the Z Slices are the number of Frames it uses to generate the Volume.
So if we change the number of Z Slices to, for example, 300, we will start looking into the future, something we don’t want for this.
This can get memory intensive, so before changing anything else we should add in a Resize node between our CB_Clear and the Volume Fog. You can press Shift and drag the Resize node in between. (04:15)
We can resize this to 250 by 250 which will be enough resolution for the god rays.
Back on the Volume Fog we only want it to use one frame so we change Z Slices back to 1. For the animation, we will add an Expression to First Slice Time, which is simply “time”. Now we see that the Volume Fog is rebuilt each frame, using our current animation. We want to increase the Sample, which is the number of slices it generates. For now, I am changing this to 128. (04:40)
Now, we can merge this to our animation by dragging and dropping the output of our Volume Fog onto our animation with particles.
I will add in a Color Corrector so we can more easily see what is happening.
As you can see, our Volume Fog goes behind our animation. This is because by default the Volume is being generated at the origin with a size of 1 by 1. Meaning, a length of 0.5 will go into the negative Z space and another in the positive Z space.
On our Volume, we go to the Shape Tab. We could theoretically move it in Z by hand, but we want to keep this procedural by using another simple expression. (05:30)

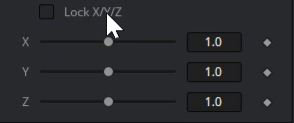
We will open the Scale Parameters and uncheck Lock X/Y/Z to get individual scale controls. Now we will open the Expression field on the Z Offset and drag and drop the whip to Z Scale and dividing that by 2.
Tweaking the Volume Look
Now this sits perfectly where we want it, although it seems to be slightly too big, this is only because we are still in Proxy mode and our already small volume resolution of 250 x 250 is scaled down even further.
While the noise we currently have does look nice and quite realistic I want many streaky lines instead.
We will go into the Noise Tab of our Volume Fog unlock the X/Y/Z Scale. For streaky lines, we don’t want much noise in Z so we will increase the Z Scale to something high like 30.
We can decrease the X and Y Scale. Due to the amount of detail we have added the Slices are getting visible again, so we should increase the amount of Samples. In my case that’s 251. (06:30)
I also want to decrease the length by decreasing the Z Scale on the Shape Tab. Thanks to our Expression the volume still fits perfectly with our animation.


