Page Contents
Page 2
Particles
Creating the Emitter
Let’s get to work on the particles. We want them to emit at the tip of our growing Splines only. To create such an Emitter we select all the nodes that make up our animation and copy them.
Instead of pasting them with Ctrl+V, we will use Ctrl+Shift+V instead. This will create Instances of our nodes. This is indicated by these green lines and means everything we change on the original will also be changed in our instances. I will rename our Instance_Base to Emitter. (00:14)
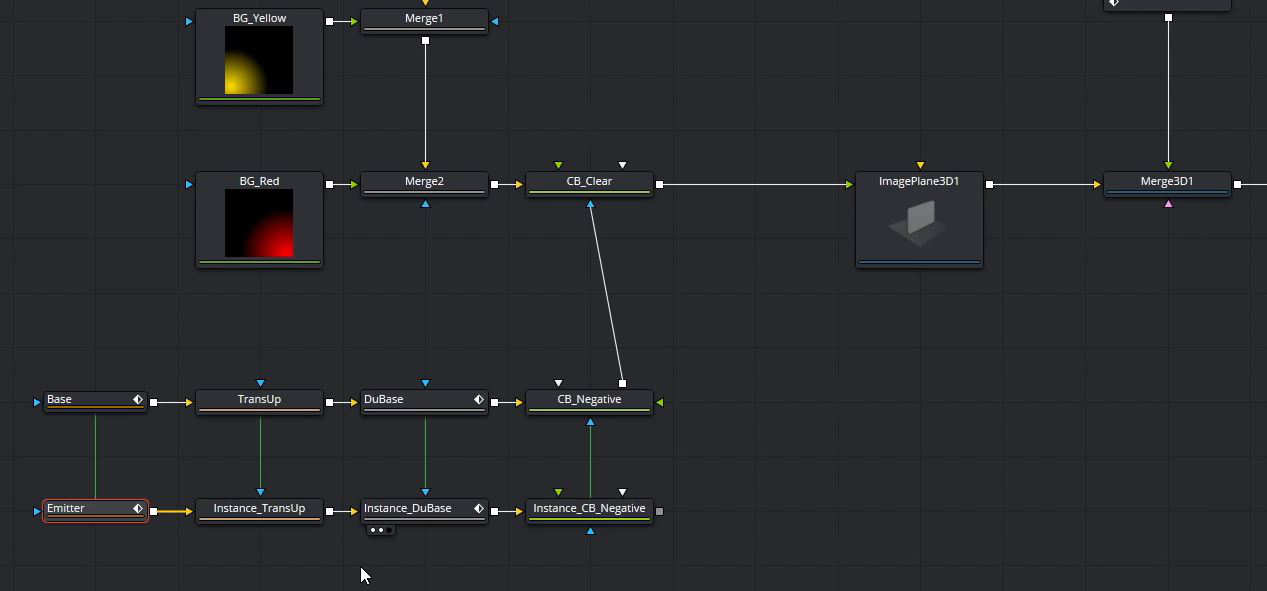
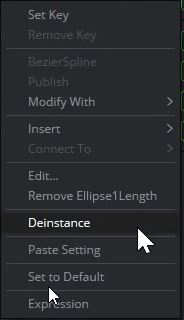
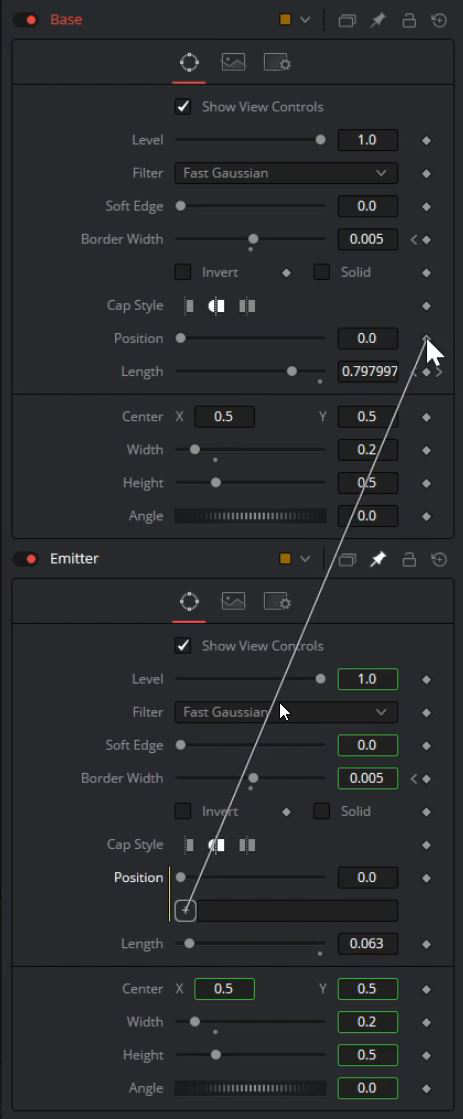
The trick is to decouple certain parameters so that we can change these without affecting our original nodes. We want to to this to the Position and Length of the Emitter by right-clicking on those and selecting Deinstance. Now, we will basically switch the Length and Position. Right-click on the Length and remove the Animation Path before decreasing the value. (00:45)

To connect this back to our original animation we will use a simple Expression. Let’s click the Pin Button above our Inspector so the Emitter node stays in the Inspector and select the Base node. Now, both nodes parameters are visible. In the Position of our Emitter type in “=” and hit Enter. The Expression field opens. We drag and drop the whip onto the Length of our Base. Now, this animates just like our Base, but they wouldn’t actually line up. This is because our Position starts at the bottom and our Length goes up in the direction of the Position. This is why we need to subtract the Length off our Position. So we will type “-WriteLength” to the Expression. (01:25)
Next we need to animate the Length.
Let’s go to the first frame and set it to 0, increase the Length a few frames later.
We also need to animate the ending to decrease the Length. And again, a little dot is still visible. We can change this by animating the Border Width again. Deinstance it, but before changing anything, we need to remove the original animation which is the same animation path that is still connected to our Base. We will simply animate this to be 0 at the start and the original Width of 0.005 a few frames later and invert this at the end of our animation. (02:00)
This will be our Emitter for the particles. And since we want our particles to have the same color as our Base we will copy and paste the CB_Clear, pipe our Emitter animation into the blue Mask Input and our colored backgrounds into the Background Input. (03:20)
pEmitter
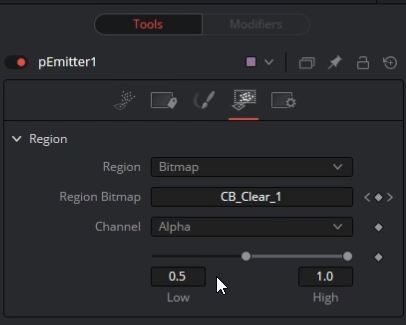
Let’s add in a particle Emitter, which is simply called pEmitter. You won’t be able to view this node until we added in a pRender. Now we can see that this has created a sphere that emits white points. Nothing fancy is happening so we will select the pEmitter, go to its Region Tab and set the Region to Bitmap. We will pipe the Emitter Animation into the newly created input on the pEmitter. (For a slightly more detailed description, click here) (03:43)
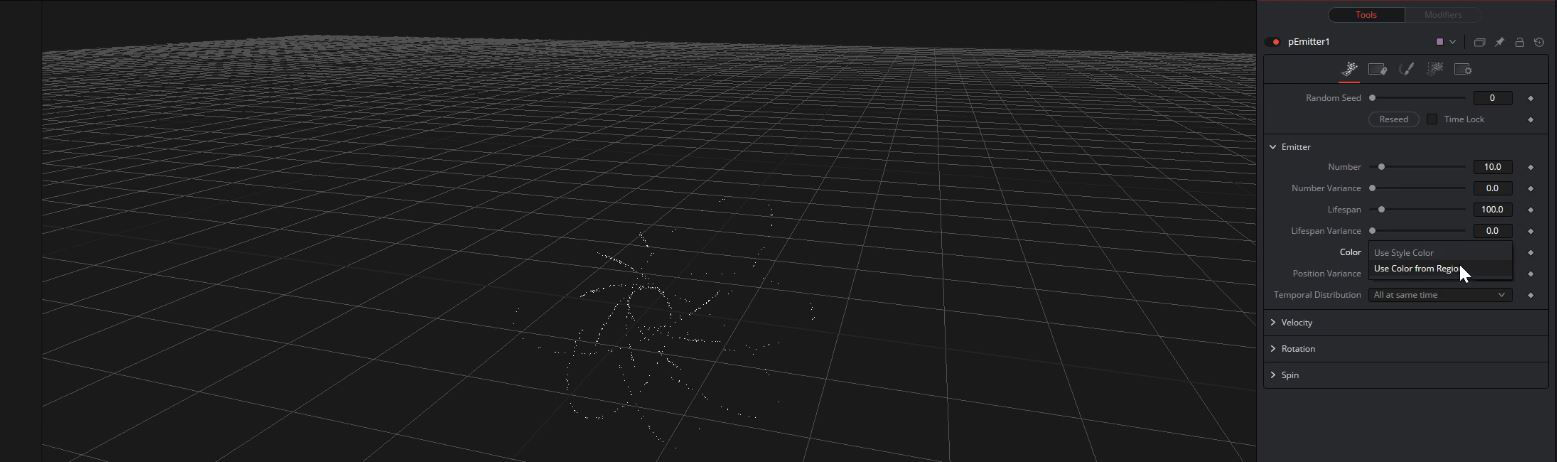
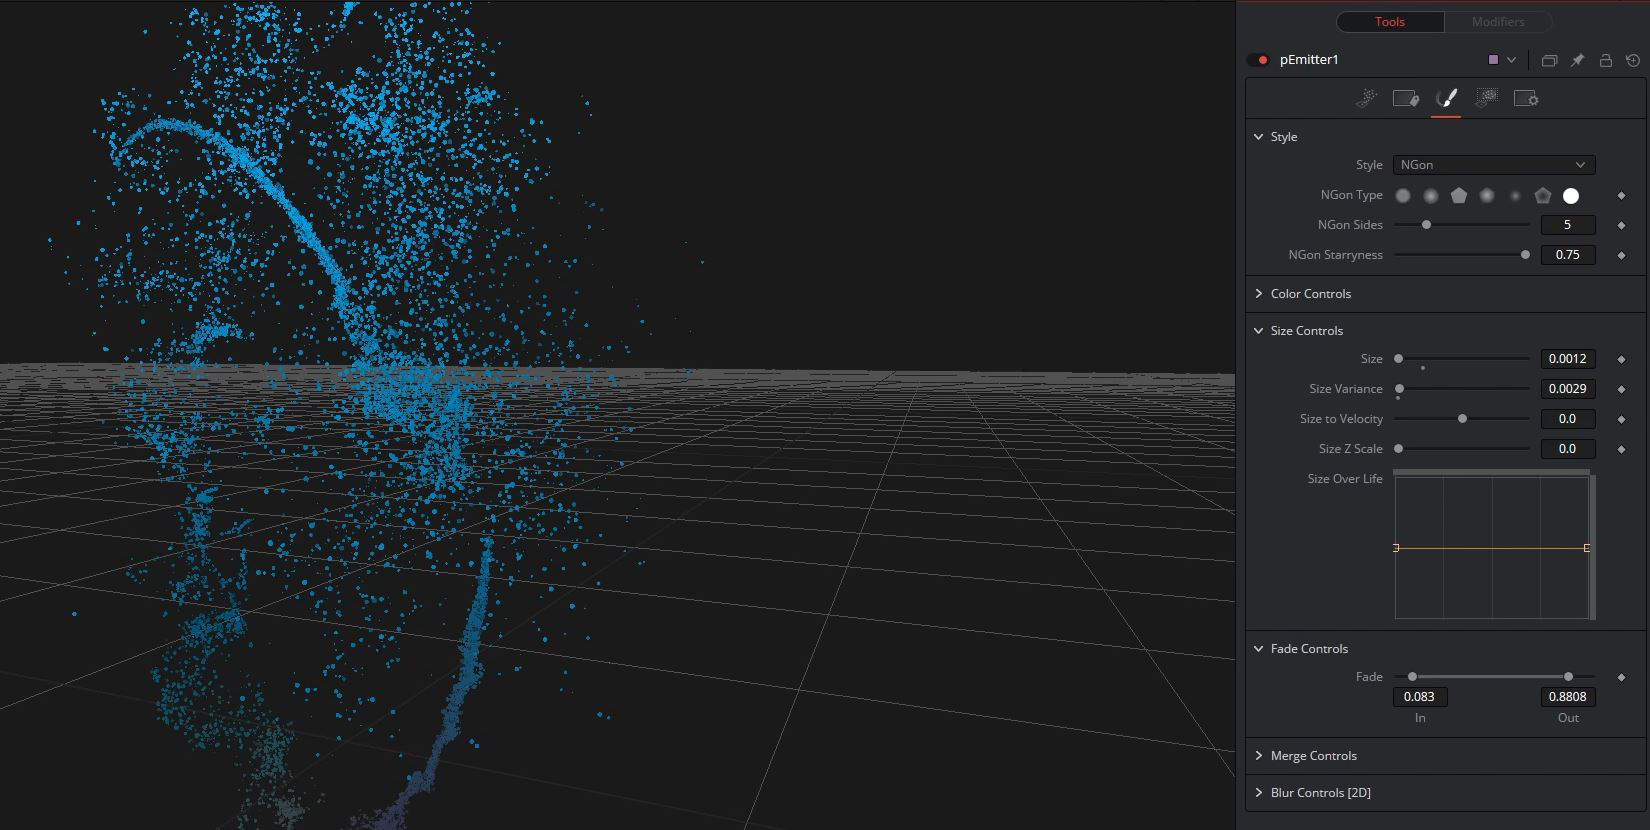
When this has updated, we can see that particles are being spawned exactly where we want, but they’re still white so we go into the Controls Tab and under Color change this to Use Color from Region. Now they inherit the color of the image but are too small to see. We will head into the Style Tab and change the Style to NGon and under NGon Type Circle. (04:40)
We can open the Size Controls and increase the Size. I will keep the Size bigger for now, so it’s easier to see them.
We will go back to the Controls Page because right now, our particles are simply spawning and eventually dying without doing anything. We need to add some Velocity. I will choose a very small number of 0.007. Currently, they’re moving to the right so we will change this by changing the Angle Z to 90 degrees. (05:05)
pTurbulence
We want them to behave in a more interesting way, so we will introduce a pTurbulence force. Immediately, you can see what this does. It adds an (almost) random force to our particles.
I know what numbers I like already, I will increase the strength on all three Axis and change the Density to 63. (05:30)
Something that I don’t like about the pTurbulence is, that the turbulence is distributed pretty uniformly. We can add in slightly more variation by going into the Region Tab and changing the Mode to When inside Region and set the Region to Bitmap. A new input is created.
We need to create a new node called FastNoise and pipe that into the pTurbulence. We will increase the Seething Rate and Contrast for now and see what this does. As you can see in some areas there is no turbulence applied and in others there is.
We can increase the Scale and Seeth Rate on our FastNoise and decrease the Threshold Low on our pTurbulence. We also need to change the resolution to 2000 by 2000 so the noise isn’t cut off at the sides. (05:58)
Right now, when our particles aren’t affected by the turbulence they will still keep the same velocity, meaning that our additional noise driving the pTurbulence won’t have a visible effect, so add in a pFriction. This will make our particles slow down over time, as for example air would do in real life. Our particles aren’t spinning so the Spin Friction won’t have any effect and by default the Velocity Friction will be too high. We can play with the numbers until we’re happy. (07:20)
Let’s go back to our pEmitter and crank up the Number. We will need a lot of particles. For now, I will set this to 500 and add some Variance of 50. I’m also going to increase the Lifespan to 200 and add in a Lifespan Variance of 70.
Now that we have more particles, we can decrease their size. We go back into the Style Tab and do just that. We definitely want to introduce some Size Variance as well.
This looks much better. We can also go to the Fade Controls and change both numbers so that our particles don’t just pop in and out when they are born or die, but rather fade in and out gracefully. (08:10)
Rendering Particles
This looks good and our particles should be done for now. Let’s look at the pRender node. We could set the Output Mode to 2D and instantly get a rendered out image, just like the Render3D, but we will need extra Output Channels that this doesn’t provide.
The Mode should be kept at 3D, meaning that once we reach the pRender this will simply be a 3D node like all the other 3D nodes in Fusion. We will add in another Merge3D after our pRender and connect the very same Camera to this new Merge3D. (08:40)
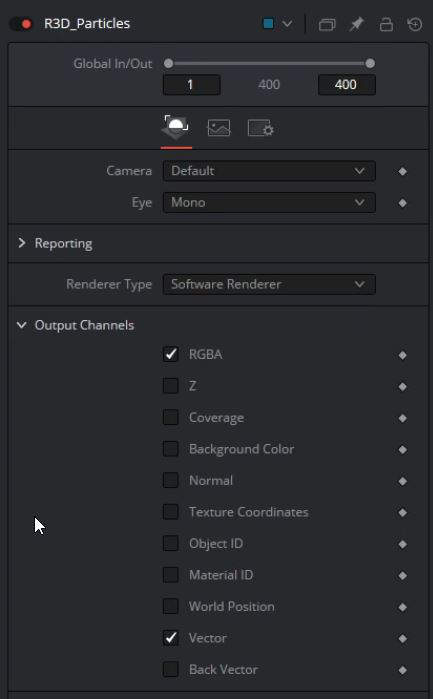
Theoretically, we could also add this to our initial 3D scene and render it with the R3D_Base, but we want to keep our Base and particles separate for now. So we add another Render3D for our particles. I renamed this one to R3D_Particles. (09:35)
Let’s take the Output of our R3D_particles and drag and drop it onto the R3D_Base to create a new Merge node with the particles in the foreground. Before we are going to the god rays, we can tweak the look of our particles slightly, I want to create a sort of lighting interaction between the Base and the particles. We do that by creating a glow effect, and since a glow is more or less a lighter blur we will add a Blur node. We need to pipe the result of our R3D_Base into our Blur and increase the Blur Size. Next, we will Merge this as the foreground after our R3D_Particles. We can change the Blending Mode to Soft Light. And to increase the effect we will add a Color Correct node after our Blur. We want to increase the Gain and Gamma until we’re happy. (10:00)
A quick note from future me, looking back at this I realize that this isn’t the best way to achieve this effect. A Color Corrector with the Blur as the Mask input will look better. This is also something you will find in the example file I provided.
Particle Motion Blur
Something that is still missing on our particles is Motion Blur. You might be tempted to go into your R3D_Particles and activate Motion Blur in the Settings Tab. And you could definitely do that, but this is an iterative effect. Meaning it needs to render the frame multiple times depending on the quality settings. 2, in this case, means it will render 2 frames to create the Motion Blur. And for this to look good we need to use at least a Quality of 8. But in scenes with that many particles, this will be very expensive while never looking as good as we want. This is why we’re going to use a great feature inside the Render3D node, which is Extra Output channels like other 3D applications can do as well. (11:05)
A quick note, sometimes there can be differences in Anti Aliasing of your RGBA Image and your Extra Output Channels which can end in artifacts but for this project, it won’t be a problem and in my experience, this is more of a problem when using Depth Blur.
Let’s go to the R3D_Particles and under Output Channels activate the Vector Channel. If you don’t have this already set to 32Bit, this is the time to set your R3D_Particles Node to 32Bit.
Nothing will happen visually until we add in the next node called Vector Motion Blur.
By increasing the Scale we will increase the effect of Motion Blur. This still isn’t super fast but in this case, it’s much faster than the iterative Motion Blur and definitely looks better.
I won’t be talking much more about how this works because this deserves to be a video or blog post of its own.


